Sheet Pan Chicken Fajitas: The Ultimate Easy Weeknight Dinner
Have you ever wondered why restaurant fajitas always seem to taste better than homemade ones? Is it really worth the sizzling skillet and multiple pans that traditional fajita recipes require? What if I told you that the secret to amazing chicken fajitas recipe is actually simplicity itself?
This sheet pan method transforms the classic dish into a hands-off meal that delivers all the flavor with minimal effort. By roasting everything together, the vegetables caramelize beautifully while the chicken stays tender and juicy – creating that perfect easy fajitas experience without the restaurant price tag.
Whether you’re feeding a family on a busy weeknight or meal prepping for the week ahead, this chicken fajitas recipe will quickly become your go-to dinner solution. The beauty lies in its simplicity – just slice, season, and roast!
Ingredients List
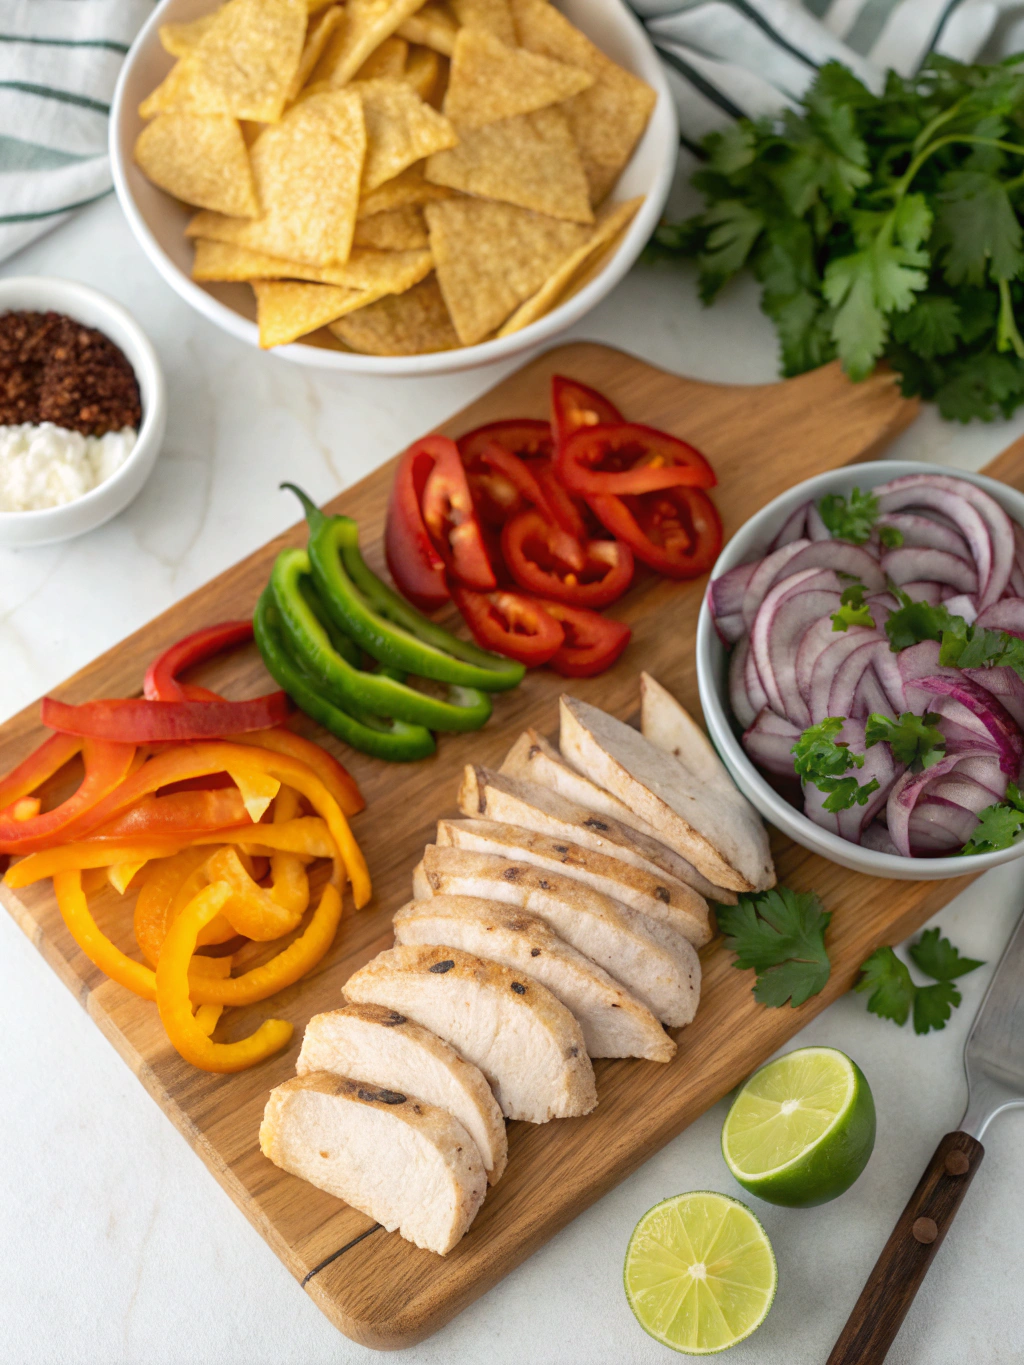
Gather these fresh, colorful ingredients for a meal that’s as vibrant to look at as it is delicious to eat. Each component brings its own flavor profile to create that authentic fajita experience.
- 2 pounds boneless, skinless chicken breasts, sliced into ½-inch strips
- 3 bell peppers (preferably different colors: red, yellow, green), sliced into ¼-inch strips
- 1 large red onion, thinly sliced
- 3 tablespoons olive oil
- 2 tablespoons fresh lime juice
- 3 cloves garlic, minced
- 1 tablespoon chili powder
- 2 teaspoons ground cumin
- 1 teaspoon smoked paprika
- 1 teaspoon dried oregano
- ½ teaspoon cayenne pepper (adjust to taste)
- 1 teaspoon salt
- ½ teaspoon black pepper
- 8-12 small flour or corn tortillas
For substitutions: Use chicken thighs for juicier results, portobello mushrooms for a vegetarian option, or swap in cauliflower florets for a lower-carb alternative. Can’t handle spice? Reduce or omit the cayenne pepper without sacrificing flavor.
Timing
Preparation time: 15 minutes to slice vegetables and chicken, plus 5 minutes to mix the seasonings.
Cooking time: 20-25 minutes in the oven with no babysitting required – that’s 40% less active cooking time than stovetop fajitas!
Total time: Approximately 45 minutes from start to finish, making this a perfect weeknight meal that doesn’t sacrifice flavor for convenience.
Step-by-Step Instructions
Step 1: Preheat and Prep
Position your oven rack in the center and preheat to 425°F (220°C). This high temperature is crucial for achieving those caramelized edges that make restaurant fajitas so irresistible. While waiting, line a large rimmed baking sheet with parchment paper or aluminum foil for easy cleanup.
Step 2: Prepare the Seasoning Mixture
In a small bowl, combine chili powder, cumin, smoked paprika, oregano, cayenne, salt, and black pepper. Add minced garlic, lime juice, and olive oil, whisking until well blended. This homemade seasoning mixture delivers far more flavor depth than store-bought packets while allowing you to control the sodium and heat levels.
Step 3: Slice and Arrange
Slice chicken breasts against the grain into ½-inch strips – this technique ensures tenderness. Cut bell peppers and onions into even strips of similar thickness. For optimal cooking, make sure all pieces are relatively uniform in size to prevent some from overcooking while others remain underdone.
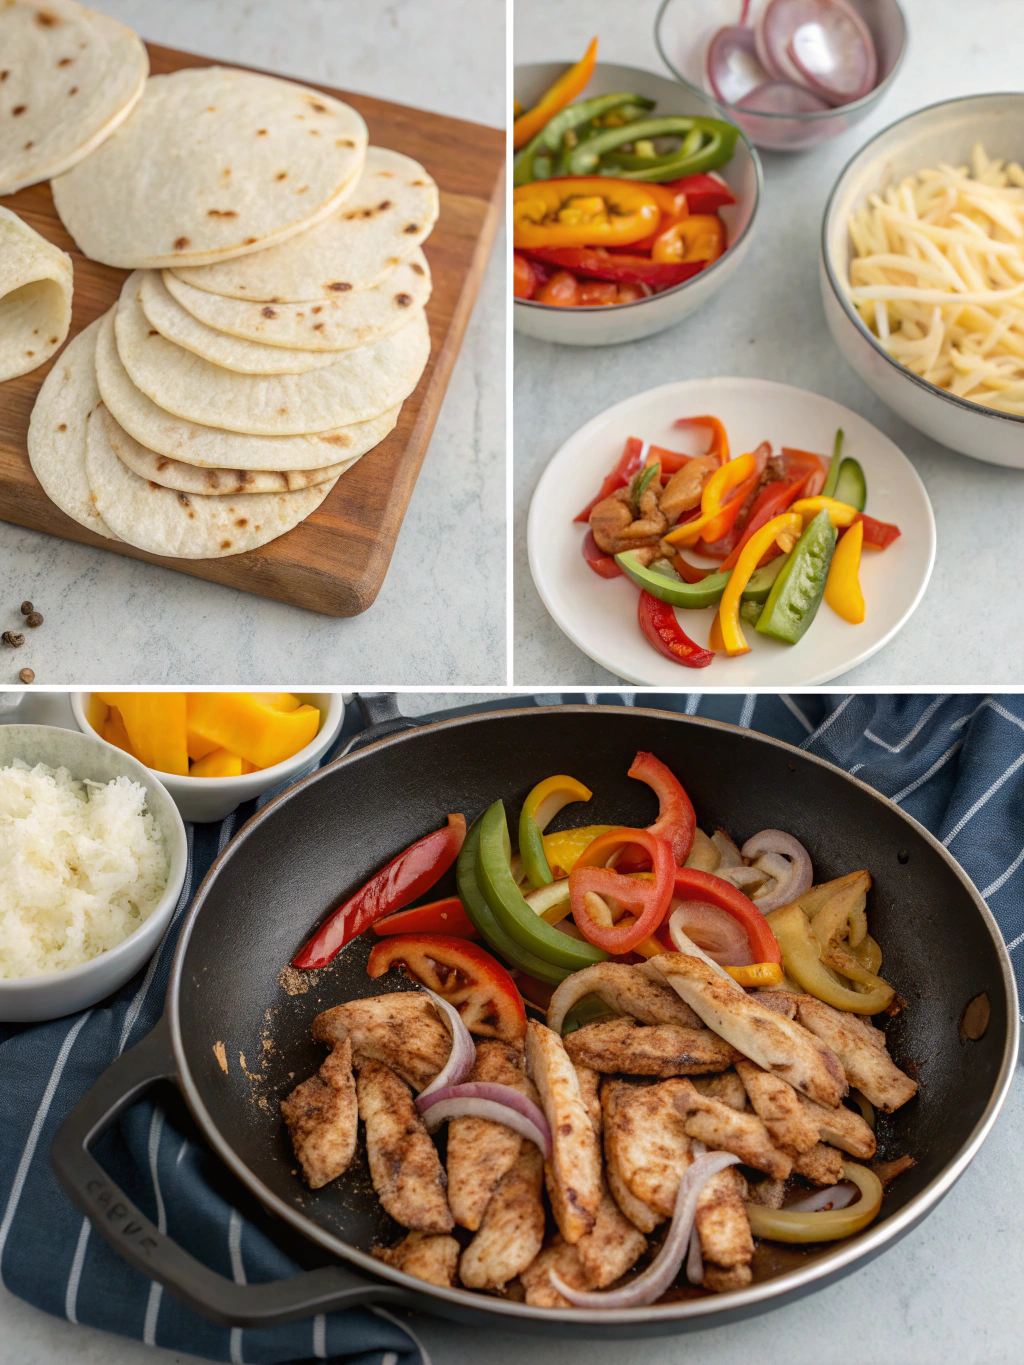
Step 4: Season Everything
Place the chicken strips, bell peppers, and onions on your prepared baking sheet. Pour the seasoning mixture over everything and toss thoroughly to coat each piece evenly. Pro tip: Use your hands (with gloves if preferred) to massage the seasoning into the chicken for maximum flavor penetration.
Step 5: Arrange for Perfect Cooking
Spread everything into a single layer, ensuring pieces aren’t overlapping. This crucial step allows for proper heat circulation and caramelization. If your baking sheet seems overcrowded, use two sheets rather than cramming everything onto one – overcrowding leads to steaming instead of roasting.
Step 6: Bake to Perfection
Bake for 20-25 minutes until chicken reaches an internal temperature of 165°F (74°C) and vegetables develop caramelized edges. For even more color, broil for the final 2-3 minutes, watching carefully to prevent burning. The contrast between charred edges and tender centers creates that authentic fajita texture.
Step 7: Warm Tortillas
While the sheet pan contents rest for 5 minutes (allowing juices to redistribute in the chicken), warm your tortillas. Wrap them in damp paper towels and microwave for 30 seconds, or char them directly over a gas flame for 10-15 seconds per side for authentic restaurant-style presentation.
Step 8: Serve and Garnish
Transfer your chicken fajitas recipe components to a serving platter or bring the sheet pan straight to the table for a rustic presentation. Serve with warm tortillas and optional toppings like sliced avocado, fresh cilantro, lime wedges, sour cream, and your favorite salsa.
Nutritional Information
Each serving (approximately 2 fajitas with filling, not including optional toppings) contains:
Calories: 380 kcal
Protein: 32g (64% of daily recommended intake for average adults)
Carbohydrates: 28g (including 3g fiber)
Fat: 14g (primarily healthy unsaturated fats from olive oil)
Sodium: 620mg (26% of daily recommended intake)
Vitamin C: 160% of daily recommended intake (primarily from bell peppers)
Iron: 15% of daily recommended intake
This balanced meal provides excellent protein content while keeping calories reasonable. The bell peppers deliver a significant vitamin boost, making this not just delicious but nutritionally sound as well.
Healthier Alternatives for the Recipe
For a lower-carb option, serve your chicken fajitas recipe in lettuce cups instead of tortillas, instantly reducing carbohydrates by approximately 15g per serving. Butter lettuce or romaine hearts work particularly well as wrappers.
To reduce sodium, cut the salt in half and amp up flavor with fresh herbs like cilantro and oregano added after cooking. This simple swap maintains the taste profile while making the dish more heart-healthy.
For a plant-based version, substitute the chicken with firm tofu or tempeh sliced into strips and marinated in the same seasoning mixture. Add an extra tablespoon of olive oil to compensate for the leaner protein source.
Serving Suggestions
Create a DIY fajita bar by serving the sheet pan contents alongside bowls of traditional toppings like guacamole, pico de gallo, shredded cheese, and sour cream. This interactive approach makes dinner fun for families and guests alike.
Transform leftovers into meal-prep bowls by serving over cilantro-lime rice or cauliflower rice with black beans for a complete protein-packed lunch that reheats beautifully.
For a refreshing accompaniment, serve with a simple side salad of mixed greens, cucumber, and radish dressed with lime juice and olive oil to cut through the richness of the fajitas.
Common Mistakes to Avoid
- Overcrowding the pan: This leads to steaming rather than roasting. If necessary, use two sheet pans to give everything proper space for caramelization.
- Cutting vegetables and chicken unevenly: Inconsistent sizes result in some pieces overcooking while others remain undercooked. Aim for uniform thickness.
- Skipping the resting period: Allowing the cooked chicken to rest for 5 minutes redistributes juices, resulting in moister meat. Cutting immediately causes juices to run out, leaving dry chicken.
- Using cold tortillas: Warming tortillas isn’t just about temperature—it makes them pliable and enhances their flavor. Cold tortillas often crack and diminish the overall experience.
- Under-seasoning: Fajitas need bold flavors. Don’t be shy with the seasoning mixture, and always taste-adjust before serving.
Storing Tips for the Recipe
Refrigerate leftover fajita filling in an airtight container for up to 3 days. The flavors actually develop overnight, making day-two fajitas sometimes even more delicious than fresh ones.
For meal prep, you can slice all vegetables and chicken up to 24 hours in advance and store them separately in the refrigerator. The seasoning mixture can be prepared up to 3 days ahead and kept in a sealed jar.
Freeze fully cooked and cooled fajita filling for up to 2 months in freezer-safe containers. Thaw overnight in the refrigerator and reheat in a skillet with a tablespoon of water to restore moisture.
Store tortillas separately from the filling to prevent them from becoming soggy. Reheat components individually for the best texture—microwave the filling until hot and quickly warm tortillas just before assembling.
Conclusion
This sheet pan chicken fajitas recipe proves that simplicity often yields the most satisfying results. By eliminating the need for multiple pans and constant attention, you get all the vibrant flavors of traditional fajitas with a fraction of the effort.
The beauty of this approach lies in its versatility—adjust seasonings to your taste, swap proteins based on dietary preferences, or change up the vegetables depending on what’s in season. The technique remains foolproof.
Have you tried this sheet pan method? I’d love to hear how your fajitas turned out! Share your experience in the comments below, or tag us in your fajita photos on social media. And if you enjoyed this recipe, be sure to check out our other sheet pan dinner ideas for more weeknight cooking inspiration!